Best Golf Simulator for Your Garage
The best garage golf simulator is not a single box. It is a compatible system that fits your ceiling height, width, depth, budget, handedness, safety plan, software goals, and upgrade path. This guide helps you choose the right setup before you buy the pieces.
The best setup for most garage golfers starts without a projector.
Our recommended starting path
For most first-time builders, the smartest garage golf simulator is a launch monitor, stable hitting mat, safe golf net, and phone or tablet display. It is quicker to finish, easier to store, less expensive, and easier to upgrade than a full projector bay.
Start with the Garmin Approach R10 when value and portability matter, or the Rapsodo MLM2PRO when app features and video feedback matter more. If garage depth is the limiting factor and your budget allows, the SKYTRAK ST MAX is the stronger compact premium path; read our full SKYTRAK ST MAX review for beside-ball placement, room requirements, ball and club data, memberships, Course Play, setup, and total ownership cost. If you are deciding between SKYTRAK’s compact beside-ball layout and Rapsodo’s lower-cost video-focused system, see our SKYTRAK ST MAX vs Rapsodo MLM2PRO comparison before choosing the launch monitor around which to build the room. Build the first version around a safe net and mat. Add an enclosure, impact screen, laser projector, better turf, and permanent room finishing only after the layout proves itself.
Measure the room before choosing the simulator.
Ceiling height determines whether you can swing safely. Width controls centered versus offset hitting and mixed-handed use. Total depth controls launch-monitor placement, ball flight, screen buffer, and projector options.
Measure from the mat
A premium mat can raise the golfer several inches. Recheck clearance with the actual mat thickness and your longest club.
Plan for real swings
Centered hitting is easier to share. Narrow rooms may require offset hitting and more side-miss protection.
Match the monitor
Behind-ball systems can require substantial room. Beside-ball camera systems reduce device space behind the golfer.
Contain bad shots
Plan around shanks, pulls, pushes, ceiling strikes, frame contact, ricochets, and screen bounceback—not only perfect shots.
| Setup Type | Launch-Monitor Position | Ball Containment | Display | Best Garage | Main Constraint |
|---|---|---|---|---|---|
| Starter net setup | Behind or beside ball | Portable net plus side protection | Phone, tablet, laptop, or TV | Shared or compact garage | Safe swing and launch-monitor depth |
| No-projector simulator | Usually behind-ball value monitor | Net or basic impact screen | Tablet, TV, or monitor | Most first builds | Device placement and software |
| Full screen bay | Behind-ball or beside-ball premium monitor | Impact screen and enclosure | Short-throw projector | Dedicated garage bay | Screen dimensions, throw distance, and safety |
Free Measurement & Planning Worksheet
Measure the garage before choosing the simulator path.
A good launch monitor can still be a bad purchase when its placement, hitting zone, screen distance, or swing clearance does not fit the room. Use the free worksheet to record the measurements that determine which setup path actually works.
- Ceiling, width, and total usable depth
- Behind-ball, beside-ball, or overhead monitor space
- Net or impact-screen clearance
- Right- and left-handed swing requirements
Enter your email to get the worksheet plus a short garage-planning email series. Unsubscribe anytime.
Three garage simulator paths that make sense.
The products are easier to choose once you know which version of a garage simulator you are actually building.
Starter net and launch-monitor setup
Plan roughly $800–$2,000- Garmin R10 or another value launch monitor
- GoSports mat and portable practice net
- Phone, tablet, laptop, or existing TV
- Side protection based on the real miss pattern
- No projector or permanent enclosure required
Video and simulator practice setup
Plan roughly $1,500–$4,000- Rapsodo MLM2PRO and compatible mobile device
- Better hitting mat for frequent practice
- Net now, with an impact-screen upgrade later
- Membership and compatible-ball planning
- TV or monitor before committing to projection
Dedicated screen and projector simulator
Plan roughly $5,000–$12,000+- Premium beside-ball or behind-ball launch monitor
- SIGPRO Softy or another joint-friendly premium mat
- GoSports enclosure and impact screen
- BenQ AH700ST laser short-throw projector
- Computer, software, lighting, wiring, and room finishing
Launch monitors to build the simulator around
The launch monitor controls tracking, room placement, software, recurring costs, and how far the setup can grow. These three products represent the most useful garage paths: value, app-led practice, and premium compact indoor use.
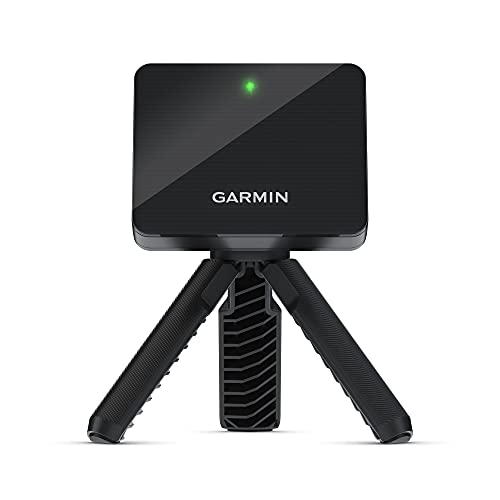
Our top starter pick for garage golfers with enough depth for a radar-based setup. It is portable, simulator-capable, and a strong value for mat-and-net practice without immediately building a premium simulator bay.
A strong choice for golfers who want app-based practice, video feedback, measured shot data, and simulator play. It combines Doppler radar with two cameras and works especially well for golfers who enjoy a mobile-first practice experience.

A premium indoor launch monitor that sits beside the ball, saving the space behind the golfer required by many radar systems. Combines photometric cameras and dual Doppler radar for detailed ball and club data.

Choose the mat and net as carefully as the monitor.
The mat affects comfort, strike feedback, stance stability, ceiling clearance, and how often you can practice. The net controls safety and determines whether the first version of the simulator is easy to use and store.
A practical starter mat for garage golfers who need a repeatable hitting surface without moving immediately into a premium mat. It works with nets, launch monitors, and basic simulator setups.

A premium hitting mat for golfers who practice frequently and want a more forgiving strike surface. It is best suited to serious garage simulator builds where comfort, durability, and joint protection matter more than the lowest price.

A budget-friendly practice net for golfers building their first garage mat-and-net station. It is a practical starting point for basic indoor practice and portable launch-monitor use, but buyers should confirm the selected size and plan additional protection for side misses and high shots.

Enclosure and projector for a dedicated garage bay
Move to a screen and projector only after the launch monitor, mat height, screen size, room width, ball position, throw distance, shadow path, and safe buffer space are planned together. If the BenQ AH700ST is on your shortlist, read our full BenQ AH700ST review for throw distance, Auto Screen Fit, brightness, screen ratios, mounting, 1080p image quality, warranty, and alternatives. If you are deciding whether the AK700ST’s native 4K upgrade is worth the extra cost, see our BenQ AH700ST vs AK700ST comparison. If you want a more value-focused 4K alternative with the same published 0.69–0.83 throw range, read our BenQ AH700ST vs TK710STi comparison.
A complete golf simulator enclosure kit for buyers who want the frame, impact screen, side and top containment, and internal frame padding organized as one system. It is the strongest starting point for a dedicated projected garage bay, but the selected enclosure size and complete room footprint must be measured carefully.

A golf-specific 1080p laser short-throw projector designed for dedicated simulator bays. Its brightness, automatic screen-fit features, quick setup tools, and golf-oriented design make it a strong overall choice when ease of installation matters more than 4K resolution.

What a complete garage simulator actually requires
The hardware price is only part of the build. Use this list to avoid spending the entire budget on a launch monitor and leaving the rest of the room unsafe or unfinished.
| Component | Starter Approach | Full-Bay Approach | Common Hidden Cost | Helpful Guide |
|---|---|---|---|---|
| Launch monitor | Garmin or Rapsodo-style portable unit | Premium beside-ball or advanced indoor system | Memberships, software, special balls, protective case | Launch monitor guide |
| Hitting mat | Stable budget mat | Joint-friendly full stance mat with replaceable strip | Floor leveling, stance extension, replacement strips | Mat guide |
| Ball containment | Portable net and side curtains | Impact screen, enclosure, side and ceiling protection | Screen replacement, frame padding, bounceback control | Impact screen guide |
| Display | Phone, tablet, TV, or monitor | Laser short-throw projector | Ceiling mount, HDMI/USB cables, streaming adapter | Projector guide |
| Computer/software | Compatible mobile device | Gaming PC and simulator software | Annual plans, courses, graphics hardware, adapters | Software guide |
| Room finishing | Lighting, floor protection, storage | Turf, wall padding, acoustic treatment, electrical work | Installation labor and future maintenance | Cost guide |
$800–$2,000
Portable monitor, mat, net, side protection, and existing display device.
$2,000–$5,000
Better monitor and mat, stronger containment, software, and upgraded display.
$5,000–$12,000
Enclosure, screen, projector, premium mat, simulator software, and dedicated hardware.
$12,000+
Premium monitor, complete finish work, custom protection, AV, turf, and permanent installation.
The best simulator is the best-matched system.
Golf Garage Guide does not claim hands-on testing unless it has actually occurred. Recommendations are based on current manufacturer documentation, product specifications, placement requirements, component compatibility, total ownership cost, upgrade paths, safety, and garage-specific practicality.
Garage golf simulator setup comparison
| Setup | Best For | Core Products | Display | Biggest Advantage | Main Limitation |
|---|---|---|---|---|---|
| Starter net setup | Beginners and shared garages | Garmin R10, GoSports mat, GoSports net | Phone/tablet | Simple, portable, and upgradeable | Less immersive; behind-ball depth still matters |
| App/video setup | Data-focused golfers | Rapsodo MLM2PRO, quality mat, net or screen | Mobile device or TV | Video, app features, spin, and simulator play | Membership and compatible-ball costs |
| Compact premium setup | Serious indoor practice | SKYTRAK ST MAX, SIGPRO Softy, net or screen | TV or projector | Beside-ball fit and detailed data | Higher cost and mixed-handed planning |
| Full projector bay | Virtual golf and entertainment | Premium monitor, SIGPRO mat, enclosure, AH700ST | Projected impact screen | Most immersive complete experience | Space, installation, software, and total cost |
Garage simulator buying mistakes to avoid
Buying the monitor first
Measure the complete system footprint before committing to tracking technology.
Ignoring mat height
A thick premium mat can turn acceptable ceiling clearance into a club-strike risk.
Planning only straight shots
Size netting and protection around shanks, pulls, pushes, ricochets, and ceiling contact.
Buying a projector too early
Screen size, throw ratio, mount position, aspect ratio, and shadow path must be calculated together.
Ignoring memberships
The desired courses, data, video, and practice tools may require annual software plans.
Overbuilding version one
A safe mat-and-net setup often produces more useful practice sooner than an unfinished premium bay.
Best golf simulator for garage FAQs
What is the best golf simulator for most garages?
For most first-time builders, the best setup is a simulator-ready launch monitor, stable mat, safe net, and phone or tablet display. It delivers useful practice without forcing a permanent screen and projector installation.
Do I need a projector?
No. A projector is optional. Use a phone, tablet, laptop, TV, or monitor until you are certain that the screen size, enclosure, throw distance, mount location, and software plan fit the garage.
How much room does a Garmin R10 setup need?
Garmin’s current instructions place the R10 6–8 feet behind the tee and require at least 8 feet from the tee to the net. Add safe screen or net buffer and comfortable golfer clearance beyond the tracking distances.
Is SKYTRAK ST MAX better for a shallow garage?
SKYTRAK ST MAX sits beside the ball, which can preserve the rear space required by many radar-style launch monitors. SKYTRAK recommends at least a 10-foot-wide by 10-foot-deep indoor area, plus enough ceiling height for a safe full swing. It still needs a level hitting surface, careful target-line alignment, device protection, and additional planning for mixed-handed use.
Is the SIGPRO Softy worth using in a simulator?
It is a premium option for frequent practice, a wide shared stance area, real-tee use, and a replaceable hitting strip. The linked 4 × 10 mat is 2.5 inches high, so ceiling clearance and floor transitions must be planned around it.
Is the BenQ AH700ST good for a garage simulator?
The AH700ST is a 4,000-lumen 1080p laser golf-simulator projector with a 0.69–0.83 throw ratio and screen-fit tools. It can be a strong full-bay option when the official throw calculation matches the finished impact-screen dimensions. See our BenQ AH700ST review for the complete garage-specific buying and installation breakdown. If native 4K is part of the decision, our AH700ST vs AK700ST comparison shows what changes between BenQ’s golf-focused 1080p and premium 4K models. For buyers also considering a lower-cost multipurpose 4K projector, our AH700ST vs TK710STi comparison compares brightness, resolution, throw distance, golf-specific setup tools, gaming, and entertainment use.
Should I use a net or impact screen?
A net is usually the better first version because it is simpler, cheaper, and easier to store. Choose an impact screen when projected virtual golf and a permanent enclosure justify the extra room, cost, and installation work.
What should I buy first?
Measure the garage, choose the setup path, and plan ball containment first. Then select a launch monitor that fits the available depth and software goals, followed by the mat, net or screen, display, and protection.
Manufacturer references used for space and product checks
Start with a safe practice system, then earn the right to upgrade it.
The best garage golf simulator is the one that fits the room, gets used consistently, and can grow without forcing you to replace every component. Most golfers should begin with a launch monitor, mat, net, and existing display. Build the screen-and-projector bay after the space, practice routine, software preferences, and upgrade budget are proven.