Best Impact Screens for Garage Golf Simulators
Compare standalone screens, multi-size options, and complete enclosure kits. Learn how to match the screen to your garage opening, projector, aspect ratio, hitting position, rear buffer, and mishit-protection plan before you buy.
The best impact screen for a garage golf simulator
The best impact screen for a garage golf simulator is large enough for your hitting bay, durable enough for repeated real-ball impact, smooth enough for a usable projector image, and installed with enough slack and rear buffer space to reduce bounceback. For most garage golfers, the safest choice is not simply the cheapest screen. It is the screen that fits the enclosure, projector, hitting distance, and side-protection plan.
Confirm these measurements before choosing a screen.
Screen listings often emphasize one width and height, but the installed bay needs additional space for the frame, side panels, top protection, screen movement, rear clearance, projector geometry, and the golfer’s hitting position.
Best impact screens and screen kits for garage golf
These four options represent different buying paths: a complete enclosure kit, a premium-style standalone screen, a multi-size screen for custom openings, and a lower-cost screen for a budget build. The Lasso displays show current Amazon images and prices. Verify the exact selected variant before ordering.
GoSports Simulator Enclosure
Best for a dedicated garage bay where the frame, top and side containment, padding, and impact screen should arrive as one system.
Durbles Triple-Layer Screen
Best for a DIY frame or existing enclosure when the buyer wants a screen-only path with grommets and bungee-style mounting.
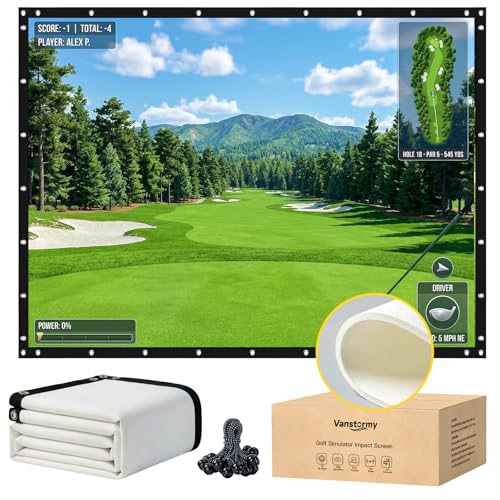
Vanstormy Multi-Size Screen
Best when the garage opening is unusual and the screen must be chosen around a specific width, height, or aspect-ratio plan.
aikeec Thickened Screen
Best for cost-conscious DIY builders who understand that the selected size, mounting, finish, and long-term wear should be verified carefully.
| Pick | Best For | Package Type | Strongest Reason to Buy | Main Watchout |
|---|---|---|---|---|
| GoSports Enclosure | Dedicated projected bay | Frame, enclosure, padding, and impact screen | Simplifies the complete-bay purchase | Large room requirement and listing-size selection |
| Durbles Triple-Layer | DIY frame or existing enclosure | Standalone screen | Screen-only upgrade path | Frame fit, viewable opening, tension, and marketplace variability |
| Vanstormy Multi-Size | Custom garage opening | Standalone multi-size listing | More sizing choices | Confirm the exact variant and resulting aspect ratio |
| aikeec Thickened Screen | Budget DIY projection | Standalone screen | Lower-cost way to add projection | Finish, noise, image quality, wear, and return terms |
A complete golf simulator enclosure kit for buyers who want the frame, impact screen, side and top containment, and internal frame padding organized as one system. It is the strongest starting point for a dedicated projected garage bay, but the selected enclosure size and complete room footprint must be measured carefully.



What does a golf simulator impact screen do?
A golf simulator impact screen has two jobs. First, it catches golf balls. Second, it acts as the projection surface for your simulator image. That makes it different from a normal projector screen, which is not designed to handle repeated golf ball impact.
Stops golf balls
The screen must be designed to handle repeated shots from wedges, irons, hybrids, fairway woods, and driver.
Displays simulator image
A smoother screen usually produces a cleaner image, while rougher or looser material may look less sharp.
Controls bounceback
Proper installation helps the screen absorb the ball instead of sending it back toward the golfer.
Do not use a normal projector screen for golf balls
A standard projector screen is for image display, not ball impact. Garage golf simulators need an actual impact screen, enclosure system, or net-based setup designed for real golf shots.
Impact screen vs golf net for garage golf
A golf net is usually simpler, cheaper, and easier to move. An impact screen is better when you want a projector simulator with virtual courses, range visuals, shot tracing, and a more finished indoor golf experience.
Golf net setup
A net is the easiest way to start garage practice. You can pair it with a mat and launch monitor, then view shot data on a phone, tablet, laptop, monitor, or TV.
- Usually lower cost
- Often easier to move or store
- Good for no-projector setups
- Less immersive than a screen
Impact screen setup
An impact screen is better when you want the golf simulator image directly in front of you. It is more immersive, but it needs more planning.
- Best for projector simulator setups
- Creates a better virtual golf experience
- Can look more finished
- Needs bounceback and enclosure planning
What size impact screen is best for a garage?
The best impact screen size depends on your garage width, ceiling height, hitting position, projector, enclosure, and safe side protection. Bigger can feel more immersive, but the screen still has to fit the garage safely.
Small garage screen
A smaller screen can work in tight spaces, but you need to be careful with side protection and projector image fit.
Medium garage screen
A medium screen often works well because it balances image size, safety, installation space, and cost.
Large garage screen
A larger screen can feel more realistic, especially in a two-car garage or dedicated simulator bay, but it needs more room.
Use the viewable opening to calculate aspect ratio.
Divide screen width by screen height. A 12-foot-wide by 9-foot-high opening is 1.33, which is 4:3. A 16-foot-wide by 9-foot-high opening is 1.78, which is 16:9. Match that shape to the projector and simulator output before finalizing the frame.
Impact screen material, image quality, and durability
Impact screens vary in feel, texture, thickness, noise, image quality, and durability. A screen that looks great may not absorb impact well, while a heavy-duty screen may not produce the sharpest projected image. The best choice depends on how often you play, how hard you swing, and how finished you want the simulator to look.
What a good screen should do
- Handle repeated real golf ball impact
- Show a clear projected image
- Reduce harsh bounceback when installed correctly
- Fit your enclosure, frame, or mounting system
- Hold up to wedges, irons, and driver practice
- Stay reasonably quiet for garage use
What to watch out for
- Thin material not designed for impact
- Excessive bounceback from tight installation
- Blurry or uneven projected image
- Wear marks in the main strike zone
- Loud impact noise
- Poor fit inside the enclosure or frame
Image quality and impact safety must work together
A garage simulator screen needs to look good and catch golf balls. Do not choose purely for projector image quality if the screen is not designed to safely absorb repeated shots.
Impact screen bounceback, tension, and spacing
Bounceback is one of the biggest impact screen issues in garage golf simulators. A screen that is pulled too tight, mounted too close to a wall, or installed without enough buffer space can send balls back toward the golfer.
Screen tension
The screen should not be drum-tight. Some movement helps absorb the ball and reduce harsh rebound.
Rear buffer space
Leave space behind the screen so it can flex without slamming directly into a wall, garage door, or hard backing.
Soft backing
Netting, curtains, or padding behind the screen can help protect the garage and reduce hard impact behind the screen.
Impact screen frame and enclosure fit
The impact screen is only one part of the simulator bay. It also needs to fit the frame, enclosure, side barriers, top protection, bottom area, projector image, and garage layout. A good screen installed poorly can still be unsafe or disappointing.
Basic garage impact screen layout
The best setup gives the screen room to move, protects the sides and top, and keeps hard frame parts outside the main impact area.
Side barriers
Side curtains or enclosure panels help catch shanks, pushes, pulls, and ricochets that miss the screen.
Top protection
Wedges and pop-ups can reach the top of the enclosure, ceiling, garage door opener, or overhead storage.
Bottom protection
Low shots can hit the floor, bottom frame, or lower screen area. Plan padding and safe ball collection.
Projector considerations for impact screens
An impact screen is also your projection surface, so screen choice affects the simulator image. Before buying a screen, think about projector placement, screen shape, aspect ratio, brightness, image size, shadows, and lighting. If you are considering BenQ’s golf-specific short-throw option, read our BenQ AH700ST review for throw distance, Auto Screen Fit, supported screen ratios, brightness, mounting, 1080p image quality, and garage-specific installation planning.
Projector questions to answer
- Where will the projector be mounted?
- Will the golfer cast a shadow?
- Does the screen shape match the image you want?
- Will garage lighting wash out the image?
- Is the screen smooth enough for your expectations?
- Can cables be routed safely?
Garage lighting matters
- Light the hitting area without blasting the screen
- Avoid glare directly on the projection surface
- Control windows and open garage door light
- Keep launch monitor and swing video needs in mind
- Make the setup comfortable enough for regular use
- Test image quality before making permanent changes
The screen and projector should be planned together
Do not choose a screen size without thinking about the projector. The projector has to fill the screen from a safe location while avoiding shadows, glare, awkward mounting, and dangerous cable runs.
Garage impact screen comparison
| Pick | Best For | What You Still Need | Sizing Risk | Best Choice |
|---|---|---|---|---|
| GoSports Enclosure | Complete dedicated bay | Mat, launch monitor, projector, computer, and extra room protection as needed | Confirm selected enclosure model and full room footprint | Best Complete Kit |
| Durbles Triple-Layer | DIY frame or replacement screen | Frame, side/top protection, rear buffer, padding, and projector | Confirm overall fabric versus viewable opening | Best Standalone |
| Vanstormy Multi-Size | Unusual garage opening | Complete mounting and enclosure system | Selected size may create a nonstandard aspect ratio | Best Sizing Choice |
| aikeec Thickened Screen | Budget DIY build | Frame, containment, backing, projector, and careful installation | Verify variant, seller, finish, and return terms | Best Budget |
How much should you spend on an impact screen?
Impact screen cost depends on size, material, durability, image quality, and whether you buy a screen alone or a full enclosure package. A screen is usually not the only cost. You may also need a frame, side barriers, padding, projector, launch monitor, mat, turf, and lighting.
Basic screen
Lower costBest for simple projector setups, light use, or early-stage garage builds.
Better screen
BalancedBetter balance of image quality, durability, noise control, and impact handling.
High-end screen
Higher costBest for dedicated simulator rooms, frequent use, and a more polished visual experience.
Enclosure system
Fuller setupIncludes more of the structure around the screen, often improving containment and setup finish.
Impact screen buying checklist for garage golf
Before choosing an impact screen, compare it against your garage layout, projector plan, simulator goals, and safety needs.
Does it fit the garage?
Check width, height, frame space, ceiling clearance, side protection, and rear buffer room.
Can it handle impact?
Make sure the screen is designed for real golf balls and repeated use.
Will it look good?
Consider projector image quality, screen smoothness, aspect ratio, and lighting.
Can you mount it safely?
Plan tension, slack, grommets, straps, frame padding, side barriers, and backing.
The safest screen is the one installed correctly
Screen quality matters, but installation matters just as much. A good screen installed too tight or too close to a wall can still create bounceback and safety problems.
Impact screen mistakes to avoid in a garage setup
Buying before measuring
Measure width, height, depth, garage door hardware, hitting position, and projector placement before choosing screen size.
Installing it too tight
A screen that is pulled too tight can increase bounceback and make impact feel harsher.
Leaving no room behind it
The screen needs room to flex. Do not mount it directly against a wall, garage door, or hard surface.
Skipping side protection
The screen catches center shots, but side barriers help catch shanks, pushes, pulls, and ricochets.
Ignoring projector fit
Screen size and projector placement need to work together. Otherwise the image may not fill the screen correctly.
Using the wrong screen material
A normal projector screen is not built for golf balls. Use a screen intended for simulator impact.
Best impact screen setup for most garage golfers
For most garage golfers, the best setup is a properly sized impact screen inside a safe enclosure or frame, with side protection, rear buffer space, controlled tension, a projector that fits the screen, a stable hitting mat, and a launch monitor that works in the space. For a current projector example, our BenQ AH700ST review shows how screen width, aspect ratio, throw distance, and mount position work together in a dedicated garage bay.
Durable impact surface
Choose a screen designed to handle repeated real golf shots.
Safe mounting
Use controlled tension, protected frame parts, and enough slack for ball absorption.
Mishit protection
Add side curtains, enclosure panels, padding, or netting where needed.
Clear image
Match the screen, projector, lighting, and aspect ratio before making the layout permanent.
An impact screen recommendation must evaluate the entire installed bay.
Golf Garage Guide does not claim hands-on product testing unless it has actually occurred. These recommendations are based on current manufacturer documentation, listing structure, package completeness, size availability, mounting approach, projected-image planning, replacement path, garage-space requirements, and the amount of additional containment the buyer must still build.
Related garage golf guides
Use these guides to match the impact screen to the room, enclosure, projector, hitting surface, and complete simulator budget.
Planning references used for this guide
- GoSports 10 × 8 enclosure dimensions, package contents, and 4:3 screen information
- Carl’s Place impact-screen size and aspect-ratio planning
- Carl’s Place overall versus viewable screen-dimension examples
- Indoor Golf Shop room-depth and rear-screen-clearance planning
- BenQ screen-size, throw-ratio, and projector-distance guidance
- BenQ 4:3 and 16:9 golf-simulator aspect-ratio guidance
Best impact screens for garage golf simulators FAQs
What is the best impact screen for a garage golf simulator?
The best impact screen is one that fits your garage, handles real golf ball impact, provides acceptable image quality, and can be installed with safe tension, side protection, and buffer space behind the screen.
Can I use a regular projector screen for a golf simulator?
No. A regular projector screen is not designed to catch golf balls. A garage golf simulator needs an actual impact screen or a golf net setup designed for real golf ball impact.
How do I reduce impact screen bounceback?
Reduce bounceback by avoiding excessive screen tension, leaving space behind the screen, using soft backing when needed, and testing the setup gradually before hitting full-speed shots.
Is an impact screen better than a golf net?
An impact screen is better for projector simulator setups. A golf net is usually better for simple, lower-cost garage practice without a projector.
Do I need an enclosure with an impact screen?
You do not always need a full enclosure, but side and top protection are strongly recommended in many garage setups. An enclosure can make the simulator safer and more finished.
What should be behind an impact screen?
Ideally, there should be buffer space behind the impact screen so it can move and absorb ball speed. Soft backing such as netting, curtains, or padding may help protect the garage behind the screen.
Choose the impact screen that fits your garage, projector, and safety plan.
A good impact screen can make your garage golf simulator feel much more realistic, but it has to be installed correctly. Focus on safe ball absorption, proper screen size, side protection, projector fit, and bounceback control before worrying about making the setup look perfect.